Gophish: Setting Up a Phishing Simulation Campaign
 The Gophish logo used for this lab.
Gophish is an open-source platform for running phishing simulations. You send realistic phishing emails to a defined set of targets, track who opens them, who clicks the link, and who submits credentials, then use that data to work on security awareness inside an organization.
This post walks through a full campaign: installation, configuration, execution, and results.
Attack scenario
The fictional company SNOW, a software solutions firm, wants to test how its employees react to phishing attempts. The IT team runs an internal campaign using Gophish to simulate a realistic attack.
The target is Jean LOU, a financial analyst with access to sensitive data. That kind of profile is exactly what a real attacker would go after.
 The target address is hidden here because it belongs to a real person.
Installing Gophish on Windows
Download Gophish from the official GitHub releases page:
https://github.com/gophish/gophish/releases
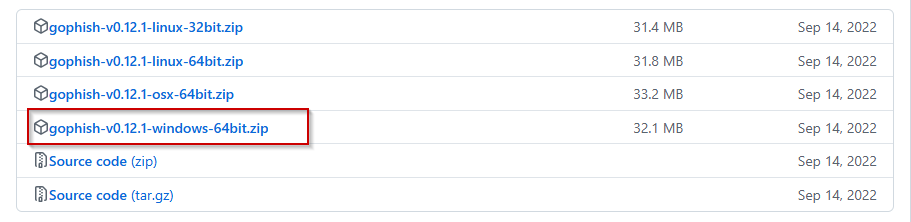 The Windows archive is available from the official Gophish releases page.
Extract the archive:
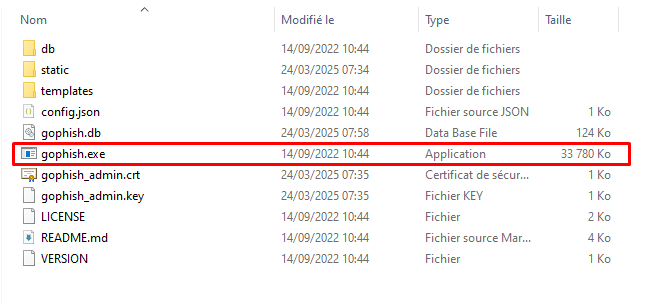 The downloaded archive contains the executable and the files needed to start Gophish.
Launch from the command prompt. The console prints your admin credentials and the local dashboard URL. Write them down before doing anything else.
 The first launch prints the local dashboard address and temporary admin credentials.
Logging in and navigating the interface
Open the URL from the console and log in with the credentials shown there. First login forces a password change.
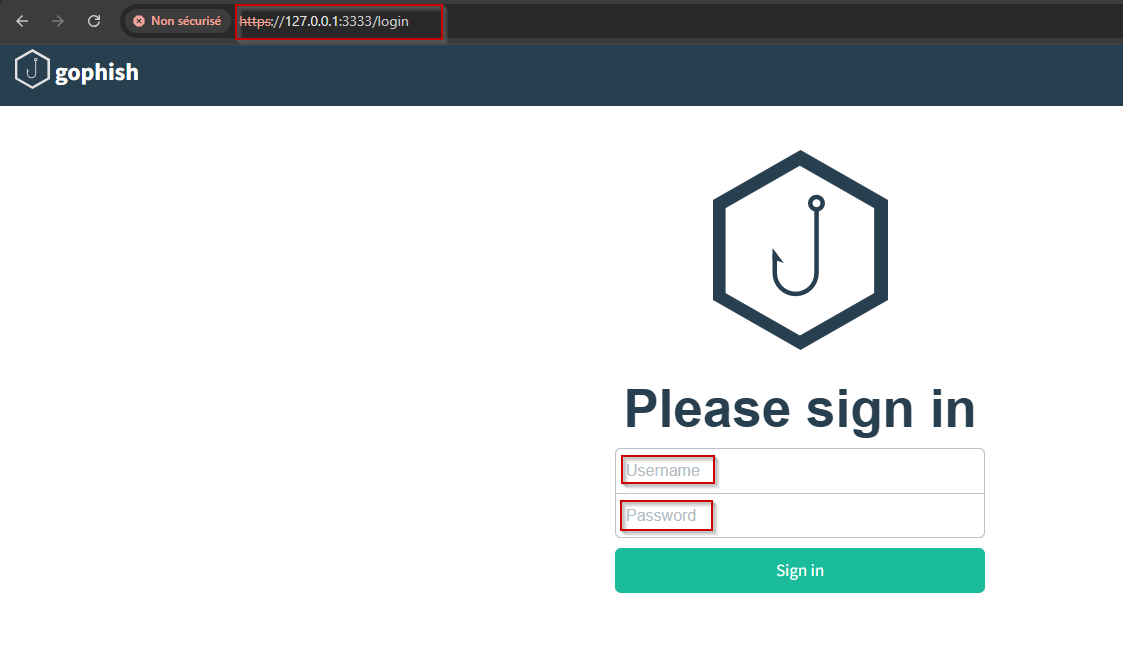 The login page is served locally by the Gophish instance.
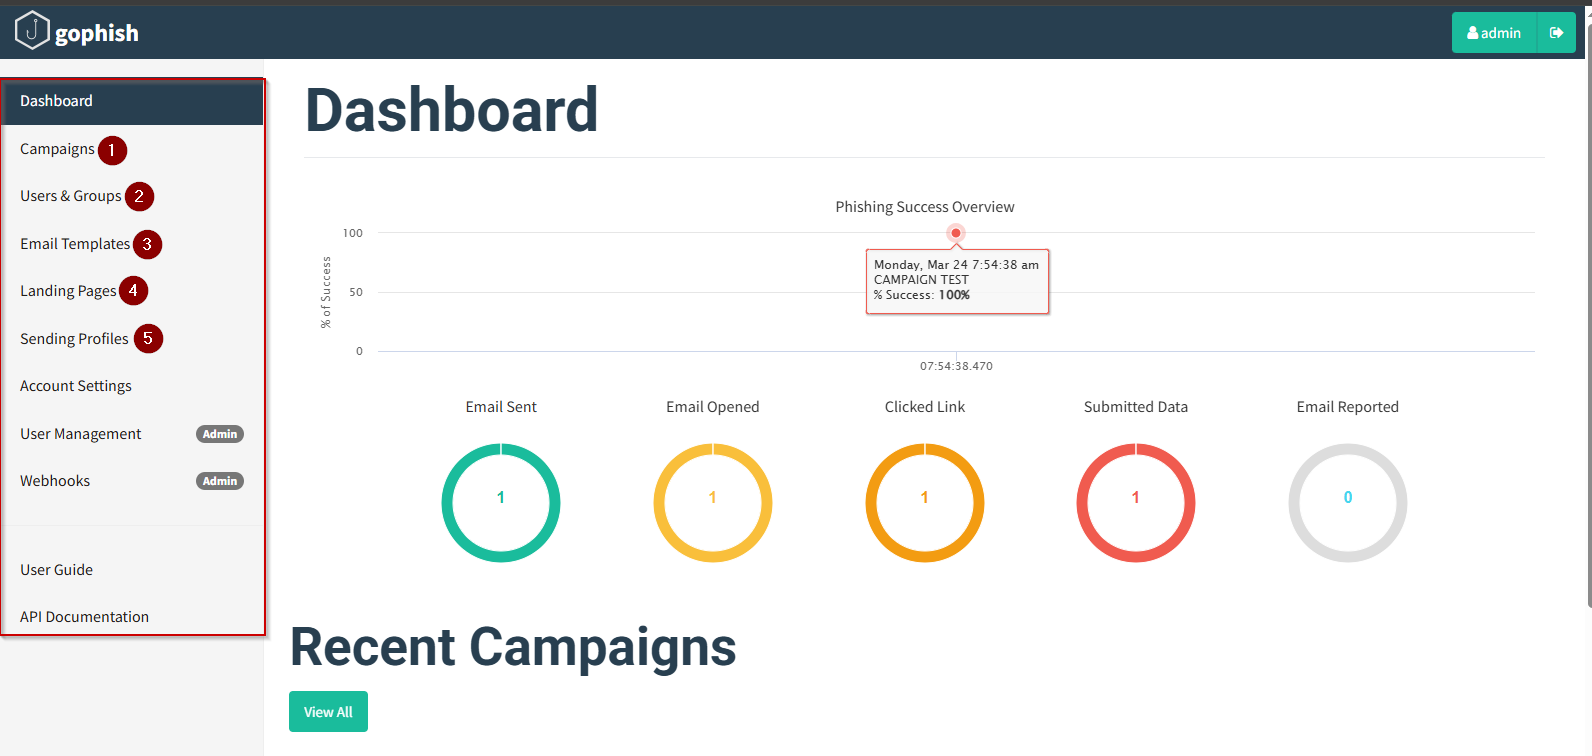 The main interface groups campaign setup, targets, templates, landing pages, and SMTP profiles.
The interface has five sections:
Campaigns is where you run and monitor phishing campaigns. You pick a target group, an email template, a landing page, and a sending profile, then launch.
Users & Groups is where you manage targets. Add users manually or import them from a CSV file.
Email Templates is where you write the phishing email the target will receive. The email needs to be convincing enough to prompt an action: clicking a link or entering credentials. Templates support HTML, dynamic variables, and a `` placeholder that Gophish replaces with the actual phishing link at send time.
Landing Pages is the page the target reaches after clicking. You typically clone a real site here. Gophish can capture submitted usernames and passwords directly from this page.
Sending Profiles is the SMTP configuration. This is where you connect a mail account so Gophish can actually deliver emails.
Practical phase: campaign configuration
Users & Groups
Go to Users & Groups and click New Group.
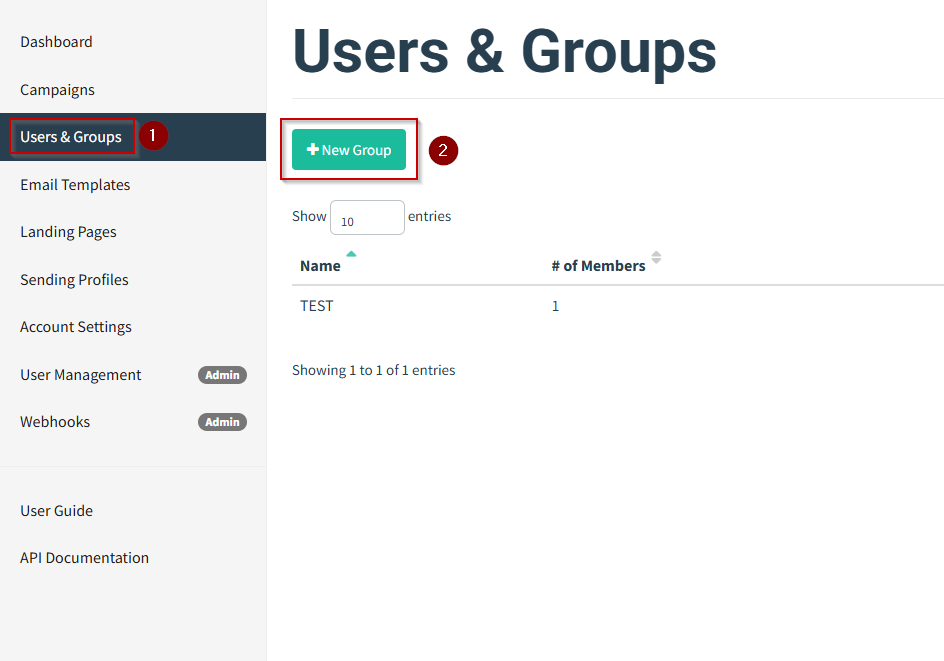 Users & Groups lists the target sets already configured.
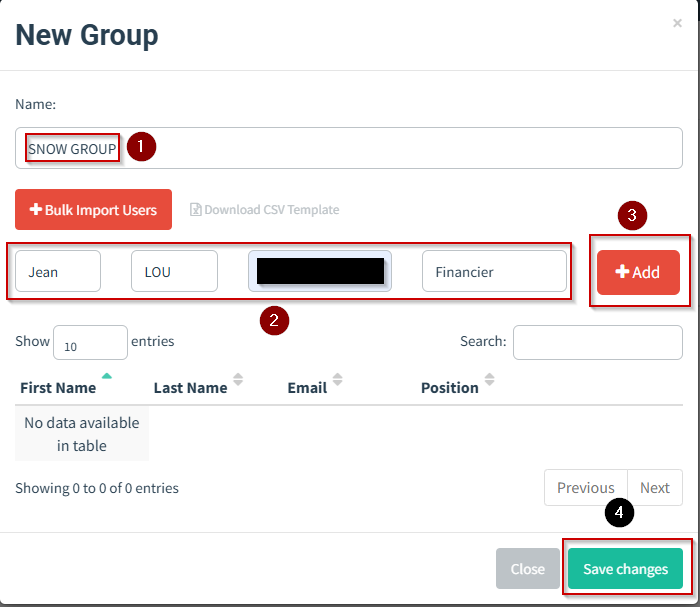 A new group can contain one target or an entire imported list.
Follow these steps:
- Enter a name for the group.
- Fill in the user details for each target:
- First name: Jean (optional)
- Last name: LOU (optional)
- Email address: hidden here for security reasons (required)
- Position: optional
- Click Add. You can add as many users as needed.
- Click Save Changes when done.
Email Template
Go to Email Templates and click New Template.
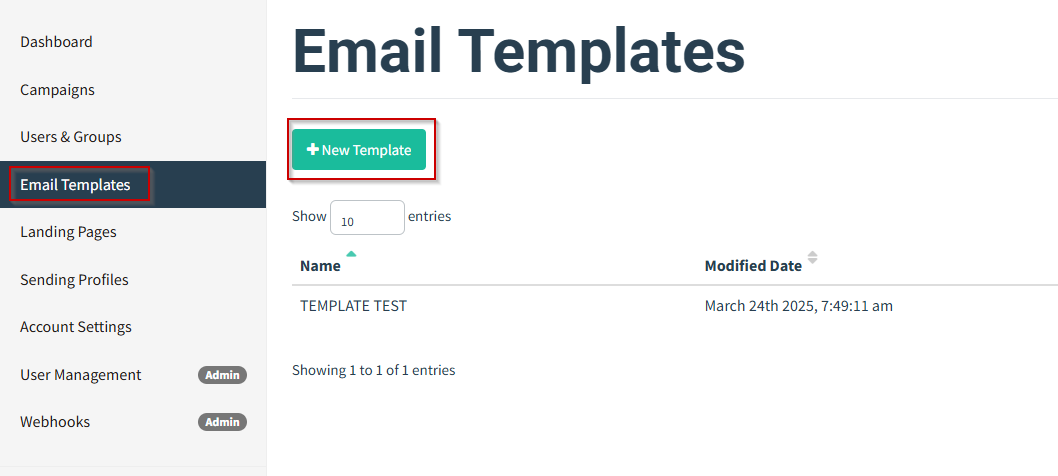 Email Templates stores the messages available to campaigns.
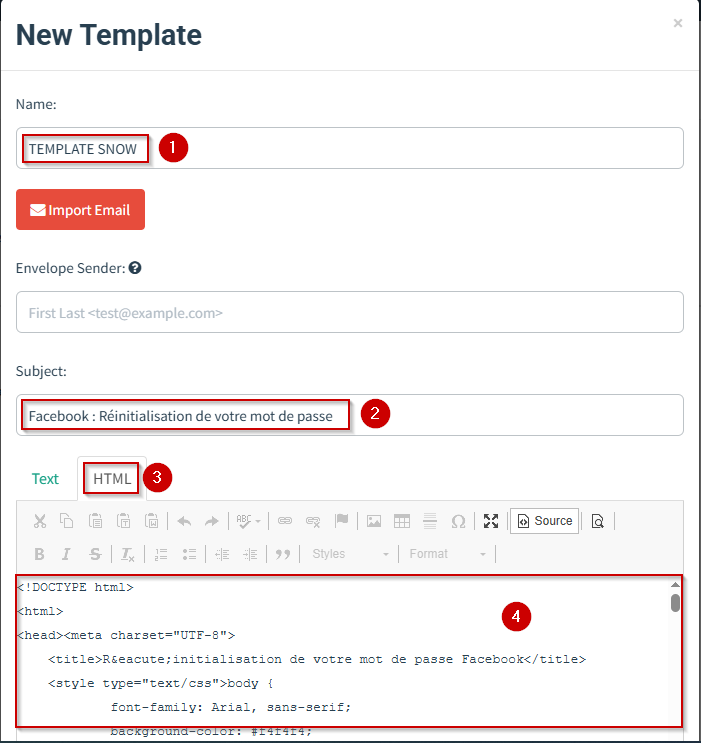 The template editor combines the subject, message body, and tracking link.
For this campaign, the email impersonates Facebook and tells the target to reset their password. The more believable the email, the more likely the target clicks.
The form fields:
- Template name:
TEMPLATE SNOW - Subject:
Facebook: Reset your password. The subject line has to match the email body to look credible. - Format: HTML is selected. This lets you build a styled, formatted email that looks like it came from a real service.
- HTML content: the body of the phishing email.
Make sure the call-to-action link uses ``. Gophish substitutes this with the real landing page URL when the campaign runs.
 The URL placeholder is replaced with the campaign link when the email is sent.
Click Source to preview the raw HTML:
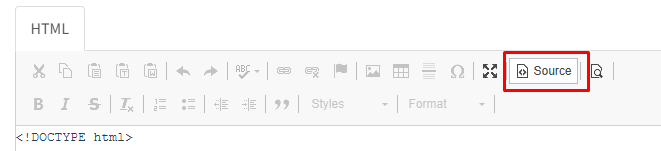 Source view gives direct access to the HTML behind the message.
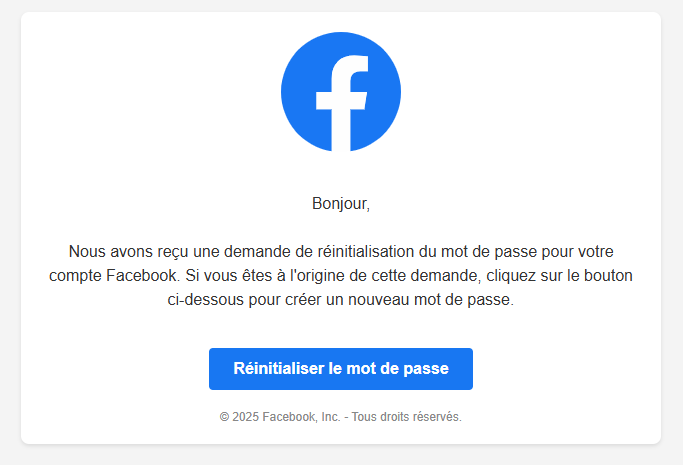 The rendered preview shows how the HTML will appear to the recipient.
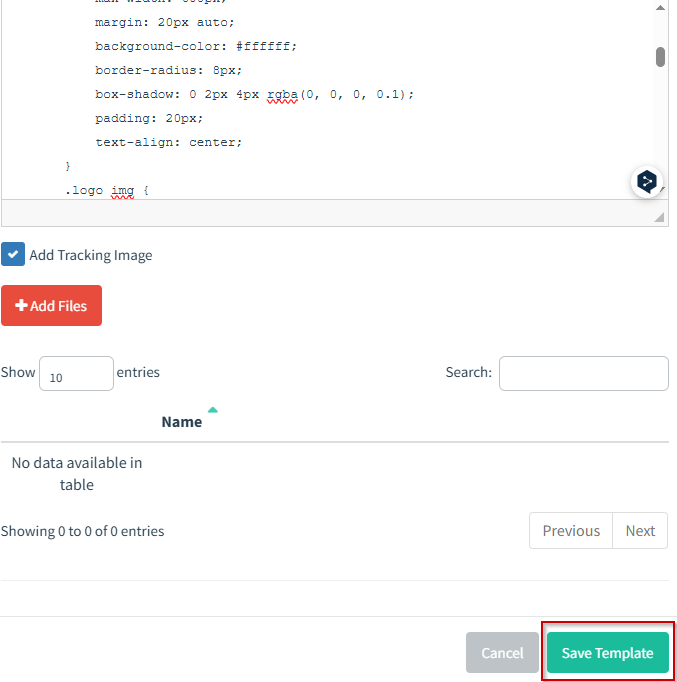 The final email preview should be checked before the template is saved.
Click Save Template.
Landing Page
The landing page is the phishing page: where the target arrives after clicking and where credentials get captured.
Go to Landing Pages and click New Page.
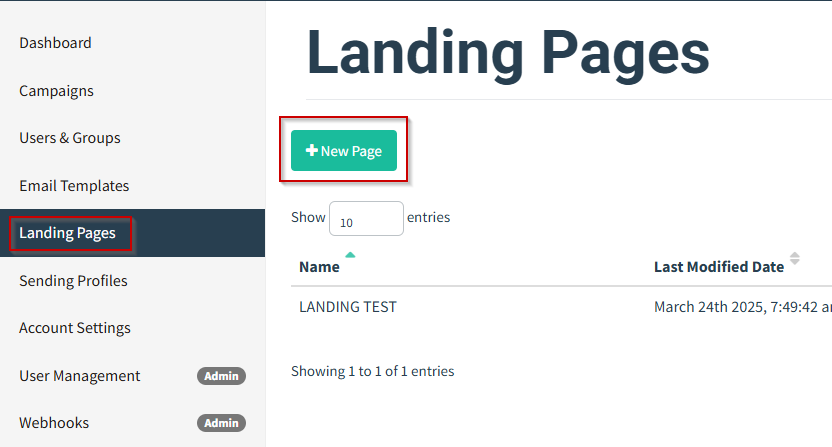 Landing Pages lists the pages that can be attached to a campaign.
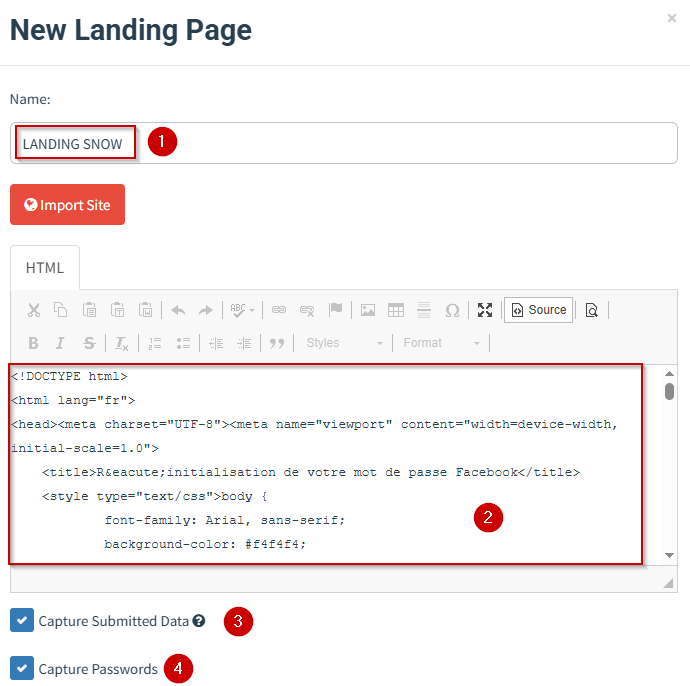 The page editor accepts cloned HTML and controls what submitted data Gophish records.
Configuration steps:
- Give the landing page a name.
- Paste the HTML code. Usually a cloned version of the site being impersonated.
- Check Capture Submitted Data to record what the target submits.
- Check Capture Passwords to store the password field as well.
Preview with the Source tab:
The cloned page can be reviewed and adjusted directly in source view.
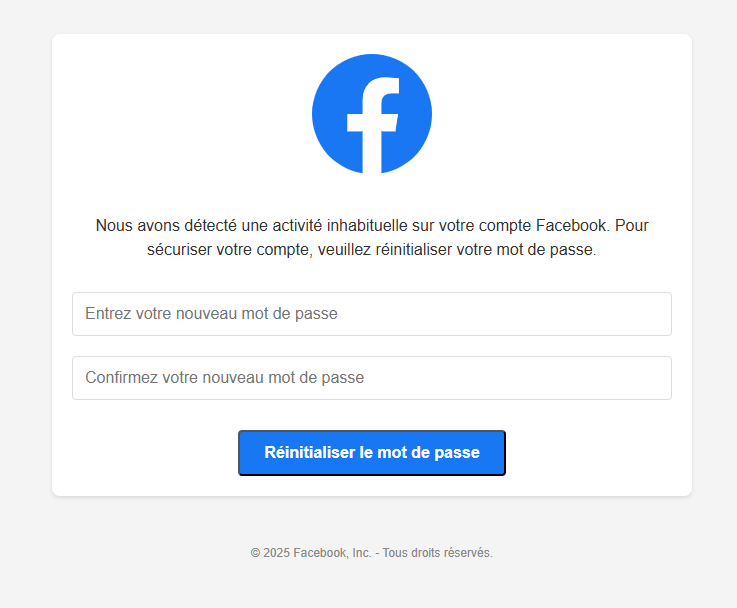 The preview reveals whether the imported page still looks correct inside Gophish.
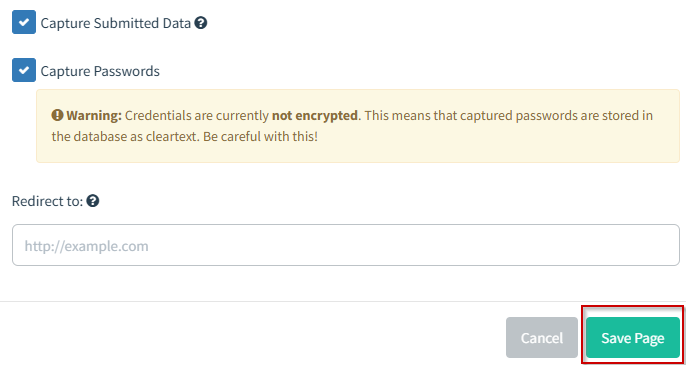 This is the page the target sees after following the link in the email.
Click Save Page.
Sending Profile
A sending profile is the SMTP configuration Gophish uses to deliver emails.
Go to Sending Profiles.
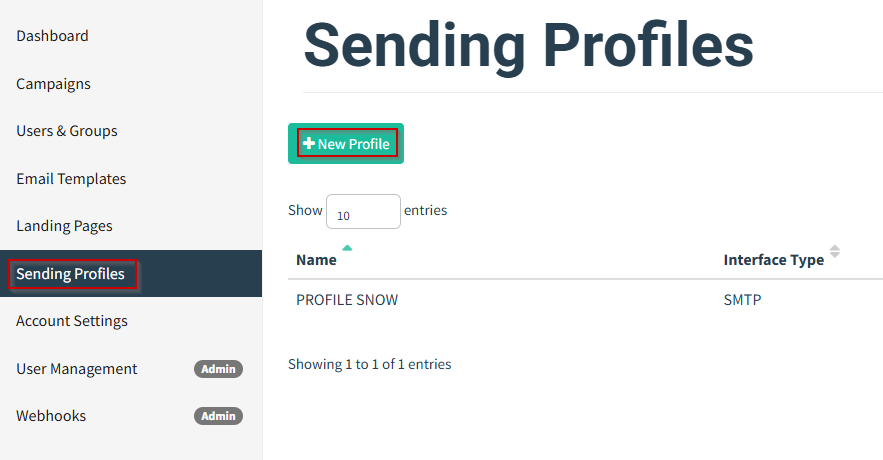 Sending Profiles keeps the SMTP configurations used to deliver campaign emails.
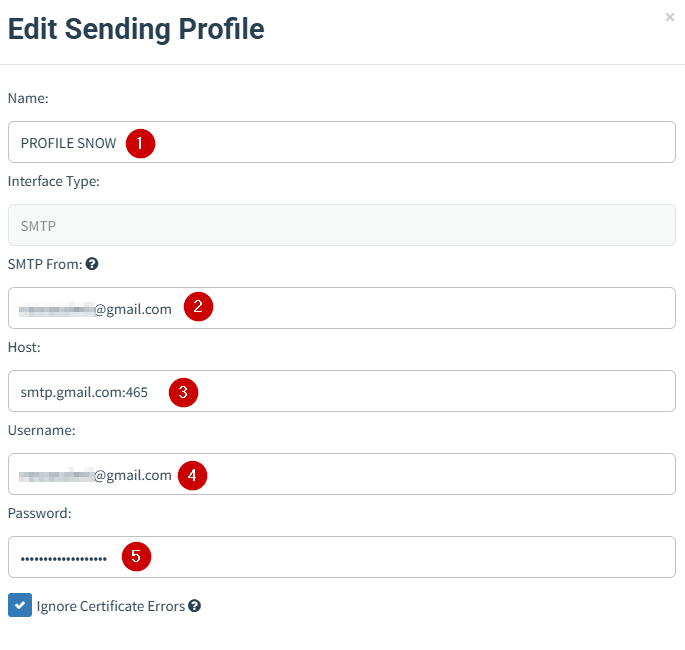 The first part of the form identifies the profile and the visible sender.
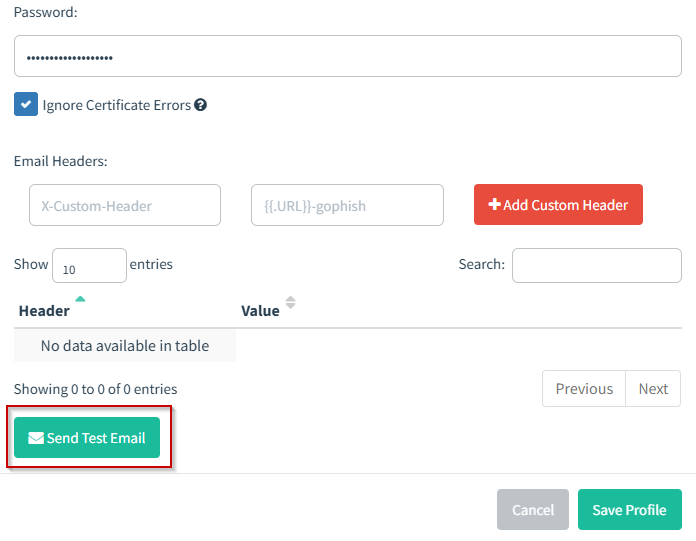 The remaining fields connect Gophish to the outgoing mail server.
The fields to fill in:
- Profile name: a label to identify this configuration.
- From address (SMTP From): the sender address shown to the target. Needs to be a valid account.
- SMTP host: the outgoing mail server. Here:
smtp.gmail.com:465. - Username: the Gmail address used to authenticate.
- Password: for Gmail, use an App Password. Regular account passwords no longer work for direct SMTP connections.
Before saving, test the configuration. Enter a valid email address and send a test message:
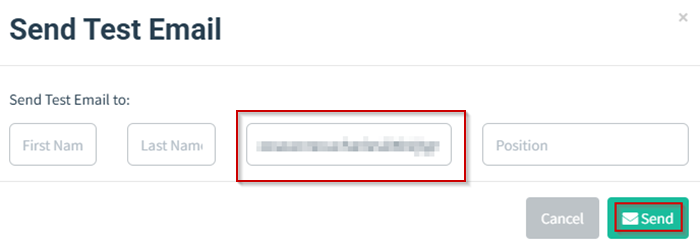 A test message checks the SMTP settings before the campaign is launched.
If the configuration is correct, a confirmation message appears:
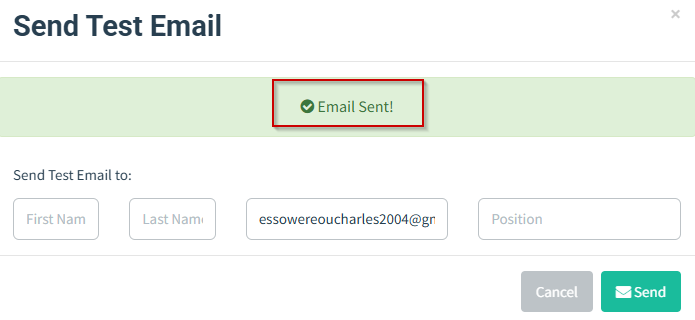 This confirmation means the test message was accepted for delivery.
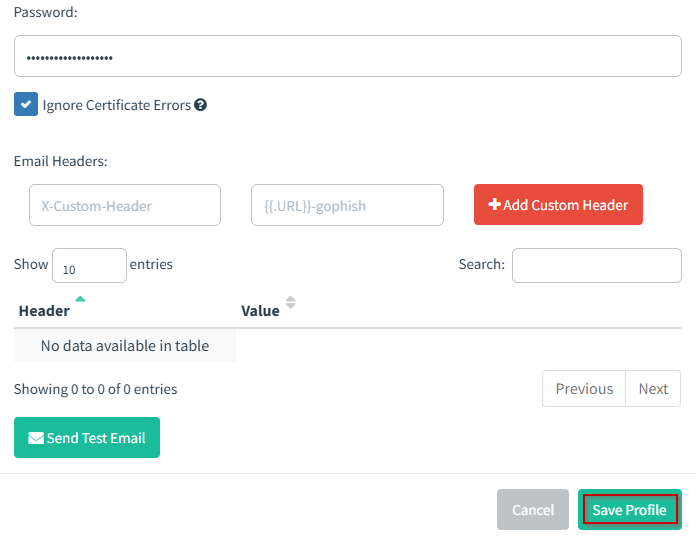 The working SMTP profile is now available for campaign setup.
Click Save Profile.
Launching the campaign
Go to Campaigns and create a new one.
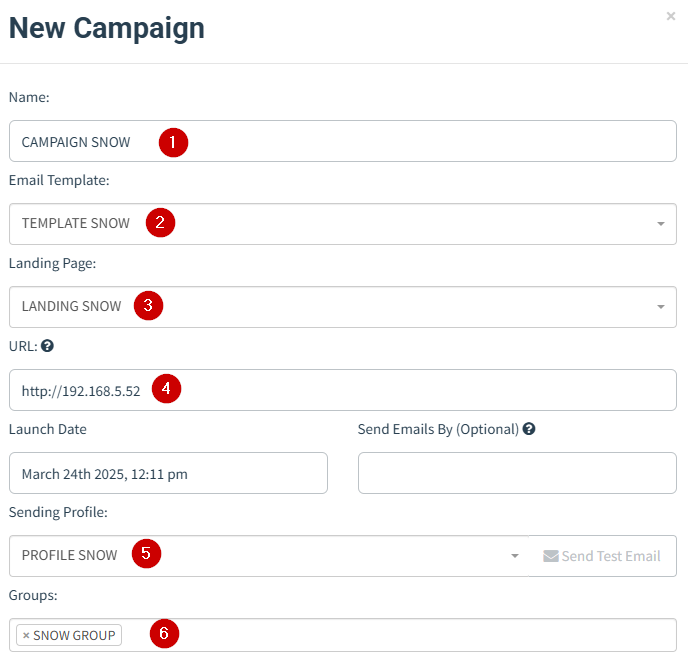 The campaign form brings together the template, landing page, sender, URL, and target group.
Six fields to fill in:
- Campaign name
- Email template (the one created above)
- Landing page (the phishing page)
- URL (the IP address or hostname of the Gophish server, this is what `` resolves to)
- Sending profile
- Target group (containing Jean LOU)
 Gophish asks for confirmation before sending the campaign.
Click Launch Campaign.
Results
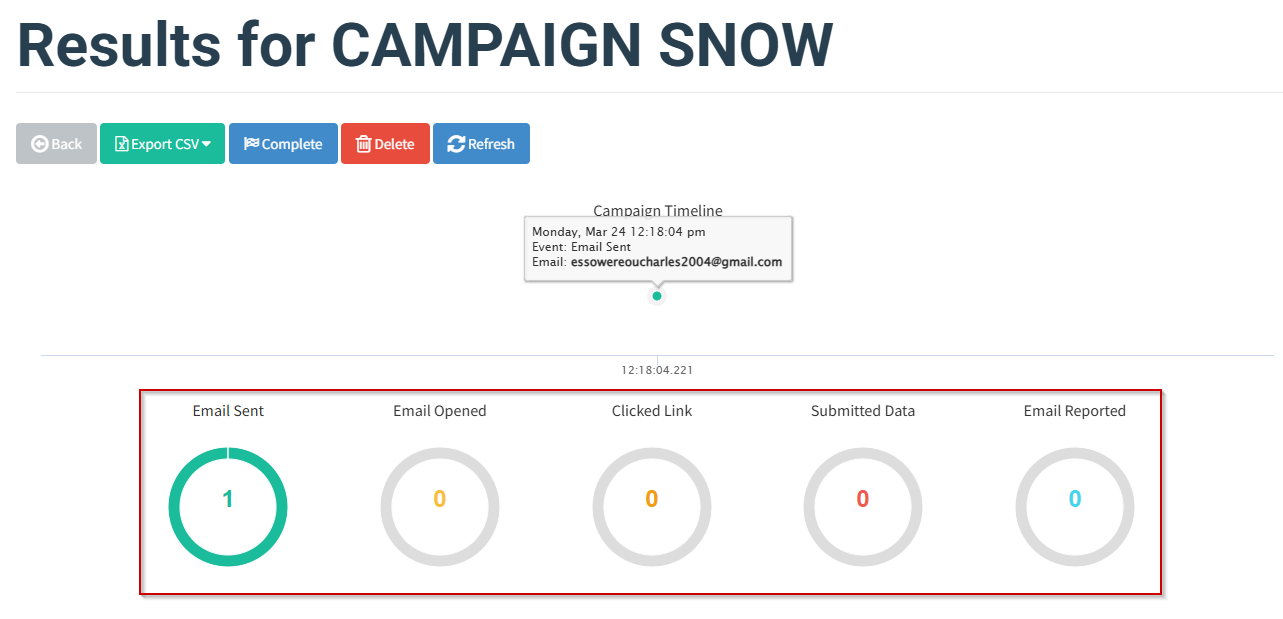 The live view starts recording events as soon as the campaign is launched.
After launching, Gophish tracks activity in real time. A few moments later, the dashboard updates:
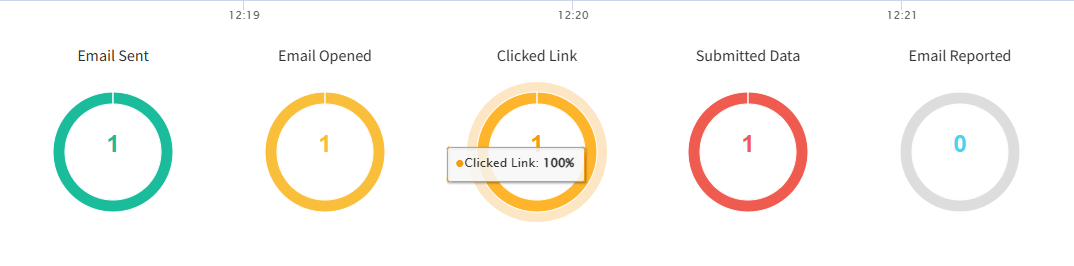 The summary records delivery, opening, link clicks, and form submissions.
- Email Sent: one phishing email delivered to the target
- Email Opened: the target opened the email (tracking pixel worked)
- Clicked Link: the target clicked the link in the email
- Submitted: the target filled in and submitted the form on the landing page
The detailed view shows exactly what Jean LOU entered:
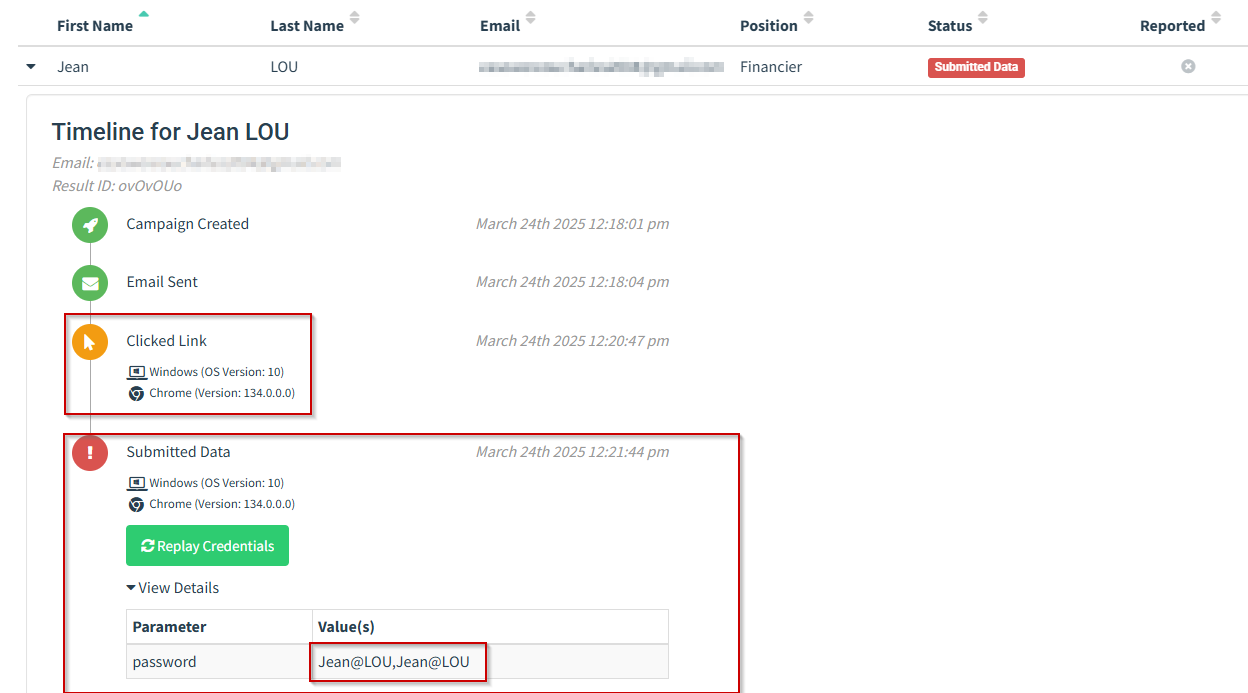 The detailed event shows the data submitted through the simulated landing page.
His Facebook credentials were captured. The simulation worked end to end.
Takeaway
The full attack chain ran without any technical exploit. No CVE, no zero-day. Just an email that looked credible enough to click. The weakness here is not the software stack, it’s the person reading their inbox.
That’s the point of running this kind of simulation: show people what a phishing attack looks like from the inside, then work on fixing the behavior rather than the system.
Jean LOU now knows.